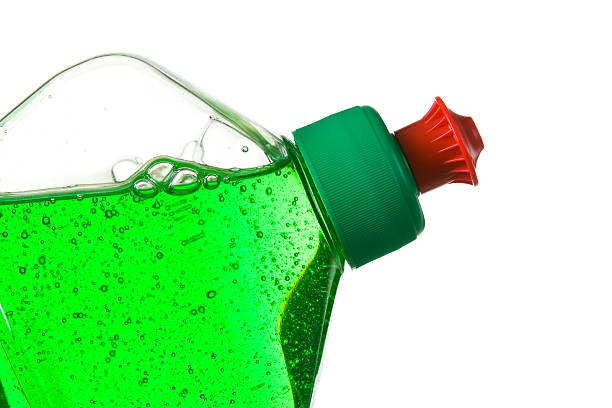
As I delved into the world of crafting homemade liquid soap, it became clear that demand for its gentle efficacy and multifunctionality is on the rise. The utility and versatility of liquid soap have secured its place in every household, making it a staple necessity.
In this dynamic landscape of liquid soaps, one particular variant stands out: Castile Liquid Soap. This exquisite soap variety offers a unique avenue for creation, demanding neither excessive effort nor complex techniques.
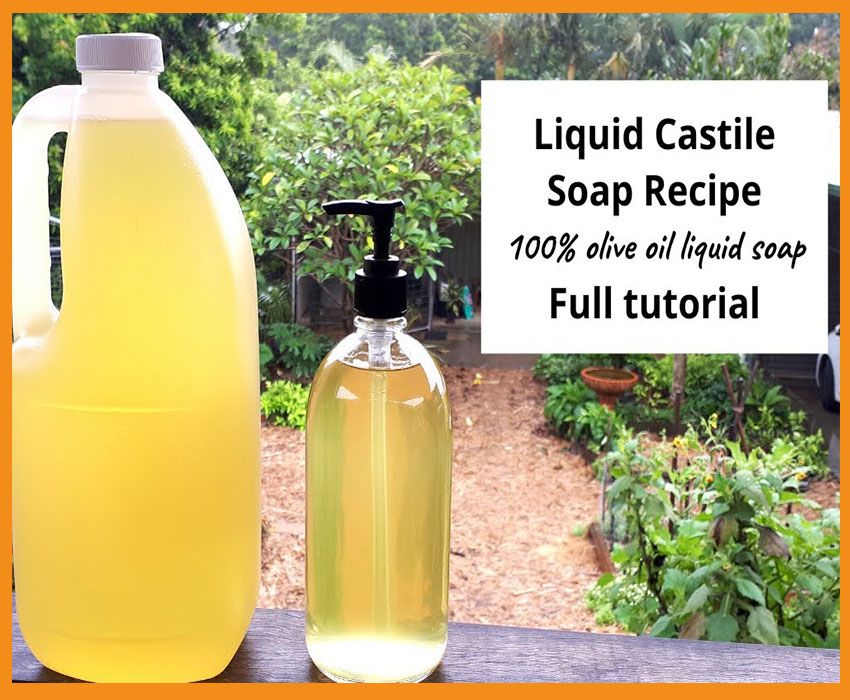
Castile Soap is vegetable-based soap derived from olive oil and named after Spain’s Castile region, It’s a plant-based cleanser, crafted using purely natural elements, it’s devoid of animal fats and synthetics. With non-toxic, biodegradable properties, it’s an eco-friendly choice.
Whether employing vegetable oils or the venerable olive oil as your base or infusing it with supplementary elements to elevate its quality, Castile Liquid Soap is an enchanting concoction worth mastering.
You might find yourself questioning the feasibility of crafting soap from vegetable oils—how is it possible? Is the process uncomplicated? Rest assured, not only is it straightforward, but it also beckons artisans of all levels.
Intrigued by the art of Castile Liquid Soap creation, I’ve meticulously fashioned this comprehensive mastery guide. Within its pages, you’ll uncover the secrets to producing Castile liquid soap of unparalleled quality—be it for your domestic haven, professional spaces, or even commercial ventures.
Dedicate yourself to absorbing each minutia I’m about to unveil. I promise that the investment of your time will yield remarkable returns. So, are you ready to embark on this illuminating journey? Excellent. Let’s delve right in.
Become Expert in Castile Liquid Soap
In this guide, I will share with you the methods of making quality Castile liquid soap.
Ingredients
- Base Oils: Vegetable oils are the main ingredient and provide the soap’s cleansing properties. Olive oil is often the traditional choice, but other oils like coconut, almond, and hemp can also be used.
- Alkali: Potassium hydroxide (lye) is used to initiate the saponification process, which converts the oils into soap.
- Water: Water is used to create the lye solution and dilute the soap mixture to the desired consistency.
- Essential Oils: These are natural oils extracted from plants and added for fragrance, therapeutic properties, and additional benefits. They also contribute to the soap’s scent.
- Fragrance Oils: Synthetic oils are used for scent and can offer a wide range of fragrance options.
- Herbal Extracts: These can be infused into the soap for their unique properties and benefits. Examples include chamomile, lavender, and calendula extracts.
- Colorants: Natural colorants like herbs, clays, and plant powders can be added to achieve desired colors. Synthetic colorants can also be used.
- Additives: Ingredients like aloe vera gel, honey, oatmeal, and others can be added for their skin-nourishing and soothing properties.
- Preservatives: If making larger batches for commercial use, preservatives may be added to prolong the shelf life of the product.
- Acidic Solution: Some recipes use an acidic solution like citric acid to neutralize excess lye after the saponification process.
- Glycerin: Some Castile soap recipes retain the naturally occurring glycerin from the saponification process, while others may add additional glycerin for its moisturizing properties.
- Protective gear: an apron, a pair of gloves, Google, and other protective gear should be available to avoid damage to your skin.
Check this: Best Way to Make 25 Liters of Liquid Soap | Learn Liquid Soap from Start to Finish
Procedure :
- Protection: Put on your protective gear. This is essential before proceeding with the production. Also, ensure there is enough ventilation.
- Ingredient Preparation: The main ingredient is a high-quality vegetable oil, usually olive oil. Place an empty, big cooker on the heater and set it at high heat. Use a measuring cup to measure 1,200 mL of olive oil and pour it into the cooker. Adjust the cooker to a high temperature to heat the oil.
- Saponification: In a mixing bowl big enough, mix the Potassium hydroxide Iye with distilled water. Firstly, pour 950 mL of distilled water into the bowl, then gently add 260g of Potassium hydroxide flakes into it. Use a mixer or turner to carefully and gently stir the mixture until all the flakes are dissolved. Then slowly add the solution to the heated olive oil while stirring continuously.
- Mixing and Reaction: Continuously stir the solution vigorously but carefully to avoid splashing. This vigorous mixing allows the alkali and oil to react together to form soap molecules and glycerin. This process usually takes a few hours to complete. Firstly, stir for a few minutes until the mixture becomes somewhat thickened and opaque in colour. Then, cover the cooker and allow the solution to cook for 3 hours, stirring every 30 minutes.
- Clarity Check: After about 3 hours, check to see if the soap looks translucent with a gel-like consistency. If it does, use a measuring spoon to transfer a small amount of the soap mixture (about 14 g) into 30 mL of hot water. If the soap melts and remains translucent, it’s ready to be diluted. If it remains cloudy, cook the soap mixture for another couple of minutes, after which you should recheck for clarity.
- Dilution: Heat about 2,400 mL of distilled water separately. After it’s heated enough, carefully pour it into the soap mixture and stir together until the two solutions are evenly mixed. Ensure you don’t add unheated distilled water to the heated solution of the soap mixture, as it may cause cracking in your cooker. Also, be gentle while pouring the heated distilled water to avoid splashing it on your body.
- Addition of color and other ingredients: This is done in the dilution stage to ensure an even distribution of color and other ingredients throughout the soap mixture.
- Cooling: Once the dilution has been done, cover the cooker and set it to a warm setting. Leave for about 5-8 hours.
- Packaging: After cooling, you can then transfer your castile liquid soap into the desired mold or package. With this, your soap is ready for use.
- Clean up: Once you’re done with the production processes, it is necessary to clean up the area as well as your body.
Precautions:
- Safety Gear: Wear gloves and safety goggles to protect your skin and eyes.
- Measure Carefully: Double-check your ingredient measurements to get the recipe right.
- Lye with Caution: Handle the lye carefully, mixing it with water in a well-ventilated area.
- Cool Before Mixing: Let lye and oils cool to a similar temperature before mixing.
- Stir Smoothly: Stir the mixture evenly to achieve a smooth texture.
- Trace It Right: Notice when soap leaves faint trails (“trace”) to know it’s ready.
- Gentle with Scents: Use essential oils cautiously for a pleasant fragrance.
- Color Gradually: Add colorants slowly and mix well for vibrant results.
- Patiently Wait: Allow the soap time to rest and cure for better quality.
- Label and Date: Don’t forget to label your soap with the ingredients and date.
Please ensure you keep these precautions in mind while enjoying your Castile liquid soap-making adventure!
Note: One thing about soap making: be aware of the salt forms you use. Instead of using sodium hydroxide (NaOH) as the lye, one can also use potassium hydroxide (KOH). The difference is that sodium will cause soaps to be harder, whereas potassium salts will usually result in a liquid form. For example, when making bar soap, you want sodium, but if you’re making shampoo, you want to use potassium. Just something to keep in mind.
For step by step tutorial video click here.
Conclusion:
As we wrap up this journey into the world of Castile liquid soap making, remember that you’re not just making soap; you’re crafting a unique blend of freshness and care.
With the tips and tricks you’ve discovered here, you’re all set to dive into this delightful adventure. From mixing oils to adding colours and scents, you’re the soap wizard now!
So go ahead, have fun, and let your Castile liquid soap add a touch of magic to every wash.
Please ensure that you share your thoughts with me on this blog. I’ll see you in my next post. Happy soap-making!