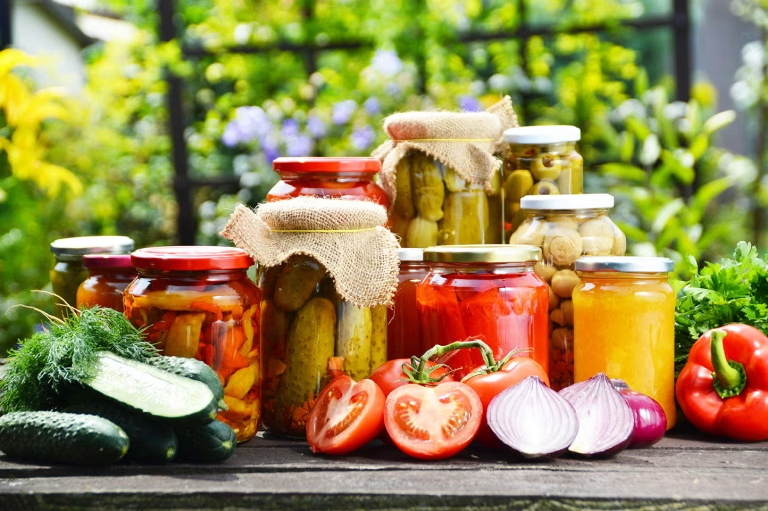
Food preservation is a skill that has served households for generations, allowing families to enjoy seasonal harvests long after the growing season has ended. Among the many preservation methods available today, water bath canning remains one of the most accessible and rewarding techniques for beginners.
Whether you’re making homemade strawberry jam, preserving garden-grown pickles, or preparing sauces and chutneys for long-term storage, understanding the fundamentals of water bath canning is essential for both quality and safety.
With more than a decade of hands-on experience and training from an experienced master canner, the process outlined in this guide focuses on the equipment, preparation, and procedures needed to confidently begin water bath canning at home.
What Is Water Bath Canning?
Water bath canning is a preservation method used for high-acid foods. These include:
- Jams
- Jellies
- Chutneys
- Pickles
- Ketchups
- Fruit preserves
- High-acid sauces
Unlike pressure canning, which is required for low-acid foods such as vegetables, soups, and meats, water bath canning relies on boiling water to safely process foods that naturally contain sufficient acidity.
For many home preservers, it serves as the ideal introduction to food preservation because it requires relatively simple equipment and straightforward procedures.
Why Learn Water Bath Canning?
Beyond preserving food, water bath canning offers a practical way to reduce waste, save money, and create homemade pantry staples that often surpass store-bought alternatives in both flavor and quality.
Homemade jams, sauces, and condiments can be prepared when produce is abundant and enjoyed throughout the year. The ability to preserve seasonal harvests is not only economical but also deeply satisfying.
Because food safety is central to successful canning, consistency is critical. Following the same procedures, using properly sterilized equipment, and maintaining an organized workspace help ensure reliable results every time.
Essential Equipment for Water Bath Canning
Before getting started, gather the necessary equipment and arrange your workspace.
A basic water bath canning setup includes:
- Canning jars
- New lids
- Reusable rings
- Canning funnel
- Jar lifter
- Magnetic lid lifter
- Bubble remover or non-metal utensil
- Large canning pot with rack
- Heavy-bottom stainless steel pot
- Clean towels and cloths
When preparing foods such as jams or preserves, a heavy-bottom stainless steel pot is recommended. Stainless steel distributes heat evenly and avoids potential reactions that can occur with aluminum cookware.
One of the major advantages of home canning is sustainability. Jars and rings can be reused repeatedly, while only the lids typically need to be replaced for future batches.
Preparing and Sterilizing Jars
Cleanliness plays a vital role in safe home canning.
Even when using brand-new jars, thoroughly wash jars, lids, and rings with hot, soapy water before use.
There are several methods for sterilizing jars:
Oven Method
Place clean jars in a 275°F (135°C) oven for 10 to 15 minutes.
Boiling Water Method
Submerge jars in boiling water for approximately 15 minutes.
Dishwasher Method
Run jars through a hot dishwasher cycle if your dishwasher offers a sanitizing setting.
Many home canners prefer the oven method because it allows multiple jars to be sterilized simultaneously without occupying valuable stovetop space.
While the jars are sterilizing, keep lids warm in hot water. They do not need to boil, but maintaining warmth helps promote a proper seal during processing.
Setting Up the Water Bath Canner
The canning pot should be large enough to allow at least one inch of water above the tops of the jars during processing.
A rack is also necessary to keep jars elevated from the bottom of the pot and reduce the risk of breakage.
Fill the canner approximately halfway with water and begin heating it while preparing the food. As jars are added, the water level will rise, creating the necessary coverage.
Understanding Headspace
One of the most important concepts in canning is headspace.
Headspace refers to the empty space left between the food and the lid.
Different foods require different amounts of headspace, and recipes should always be followed precisely.
For strawberry jam, a quarter-inch headspace is typically required.
Proper headspace allows food to expand during processing while creating the vacuum necessary for a successful seal.
The Water Bath Canning Process
Once the food is cooked and the jars are hot, the filling process can begin.
A fundamental rule of canning is:
Hot product into hot jars, then into hot water.
Using a canning funnel, carefully fill each jar while maintaining the required headspace.
Next:
- Remove trapped air bubbles using a non-metal utensil.
- Recheck the headspace.
- Wipe the jar rim clean.
- Place the warm lid on the jar.
- Apply the ring and tighten to fingertip tightness.
This process should be repeated carefully for every jar.
Even small amounts of food left on the rim can interfere with sealing, making rim cleaning an essential step.
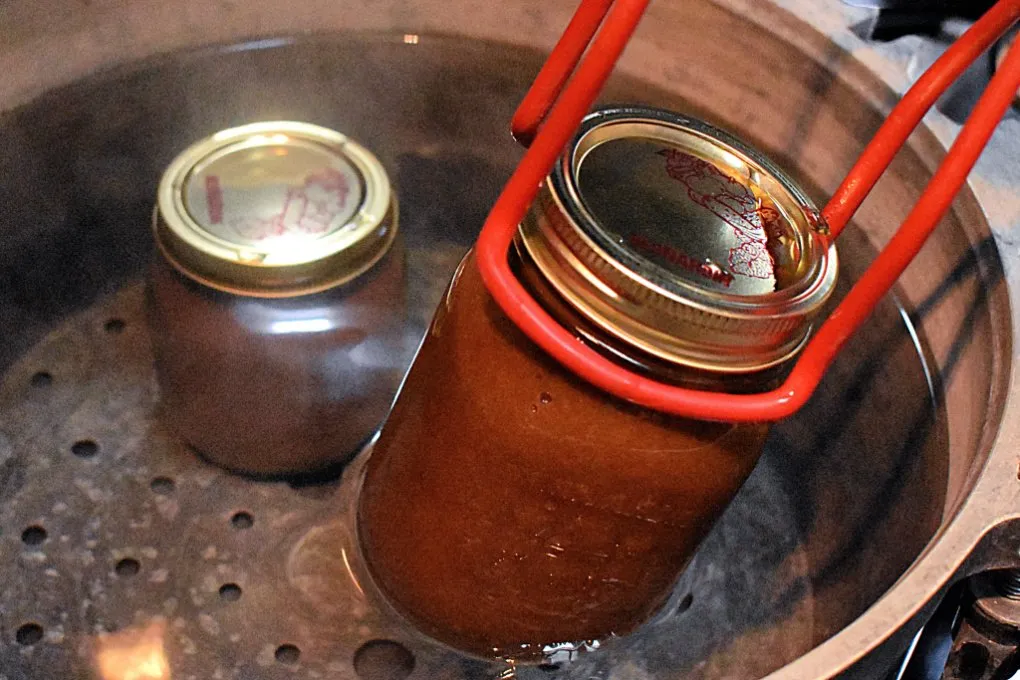
Processing the Jars
Place filled jars into the canner and ensure they are covered by at least one inch of water.
Bring the water to a full rolling boil before starting the processing timer.
Processing times vary depending on:
- Recipe
- Jar size
- Altitude
For example, strawberry jam may require 10 minutes of processing at sea level, while higher elevations often require additional time.
Always consult a trusted canning reference for altitude adjustments.
Cooling and Checking Seals
After processing is complete, turn off the heat and allow the jars to rest in the canner for five minutes.
Remove the jars and place them on a towel-lined surface with space between each jar.
Allow them to cool undisturbed for approximately 24 hours.
During cooling, many jars will produce the familiar “pop” sound that indicates a successful seal.
The following day:
- Remove the rings.
- Check each seal.
- Wash the jars thoroughly.
- Dry completely.
- Label with the contents and date.
Storing jars without rings helps prevent rust and makes it easier to identify seal failures over time.
Final Thoughts
Water bath canning is one of the most valuable food preservation skills a home cook can learn. While the process requires attention to detail, organization, and patience, the rewards are substantial.
From homemade strawberry jam and fruit preserves to pickles, sauces, and condiments, water bath canning allows you to capture the flavors of the season and enjoy them throughout the year.
By following safe procedures, maintaining clean equipment, and staying consistent with proven methods, beginners can confidently build the skills needed to create a pantry filled with high-quality homemade preserves.